Instructions for Linux
Step 1: Click on the Network icon in the system tray (usually found in the top-right or bottom-right corner of your desktop) and select Settings or Network Settings.
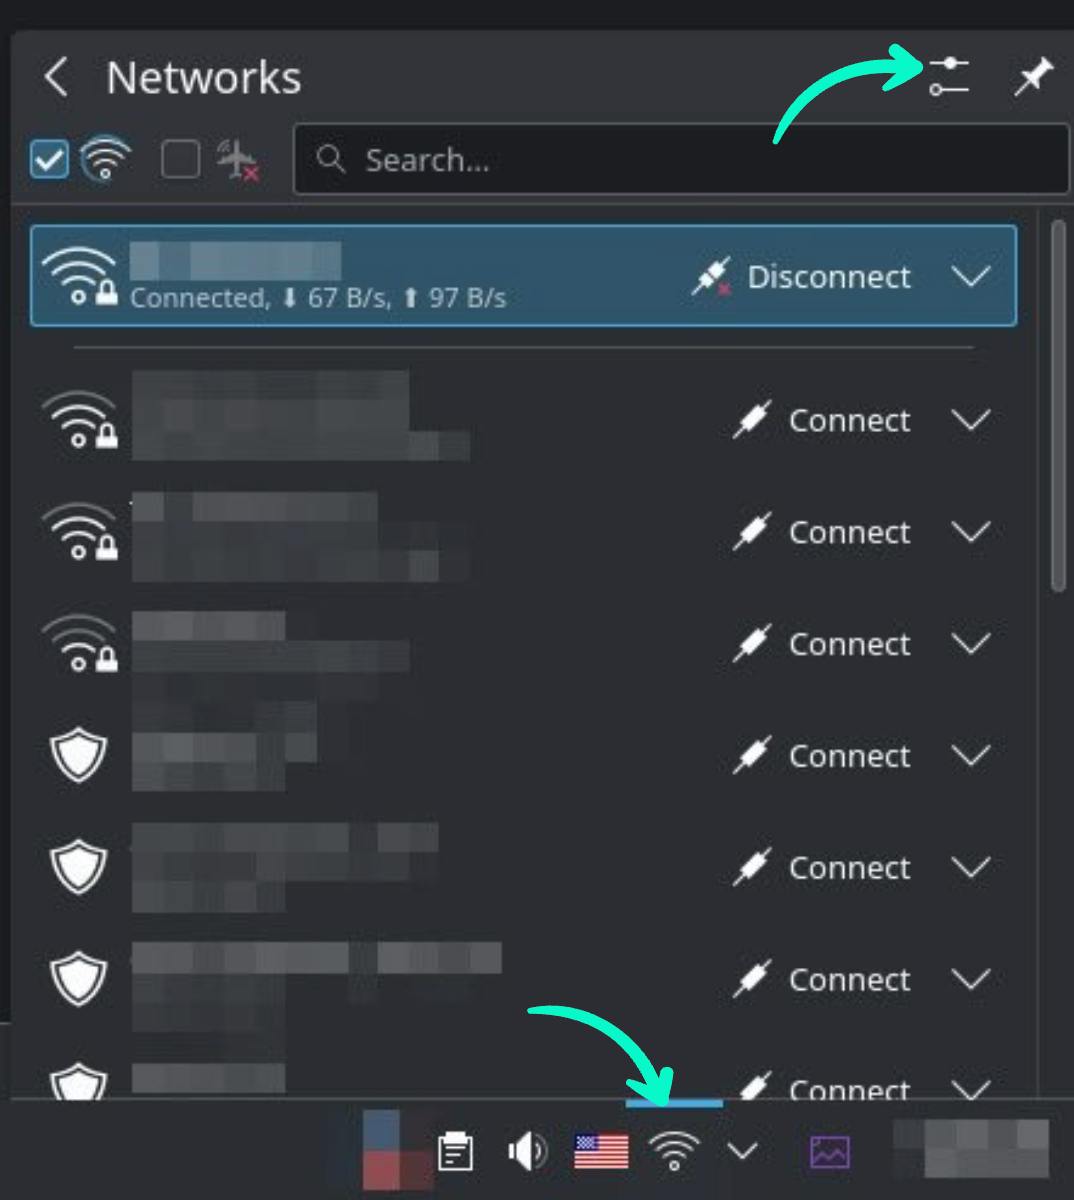
Step 2: In the Network settings, find and select the network interface you are currently using (such as Ethernet or Wi-Fi).
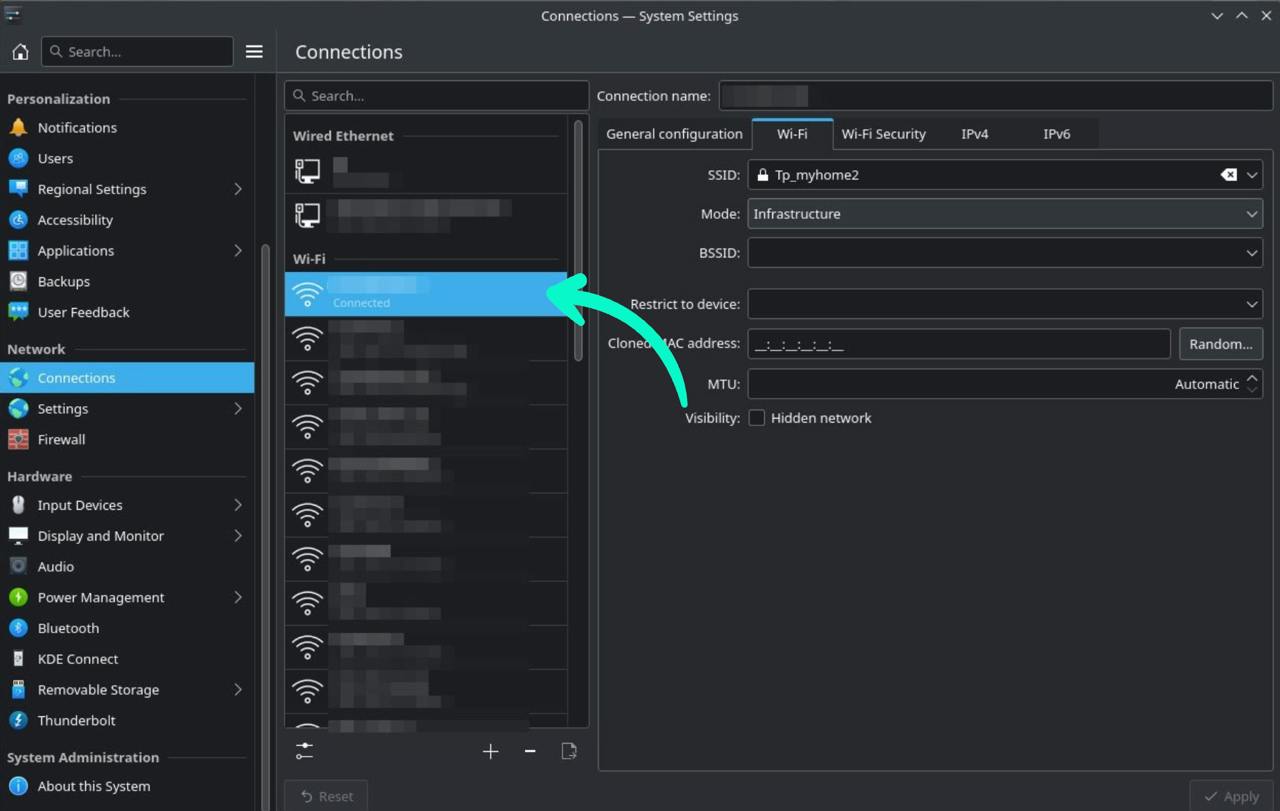
Step 3: Click on the gear icon or cog next to the selected network interface to open the network settings. Navigate to the IPv4 tab.
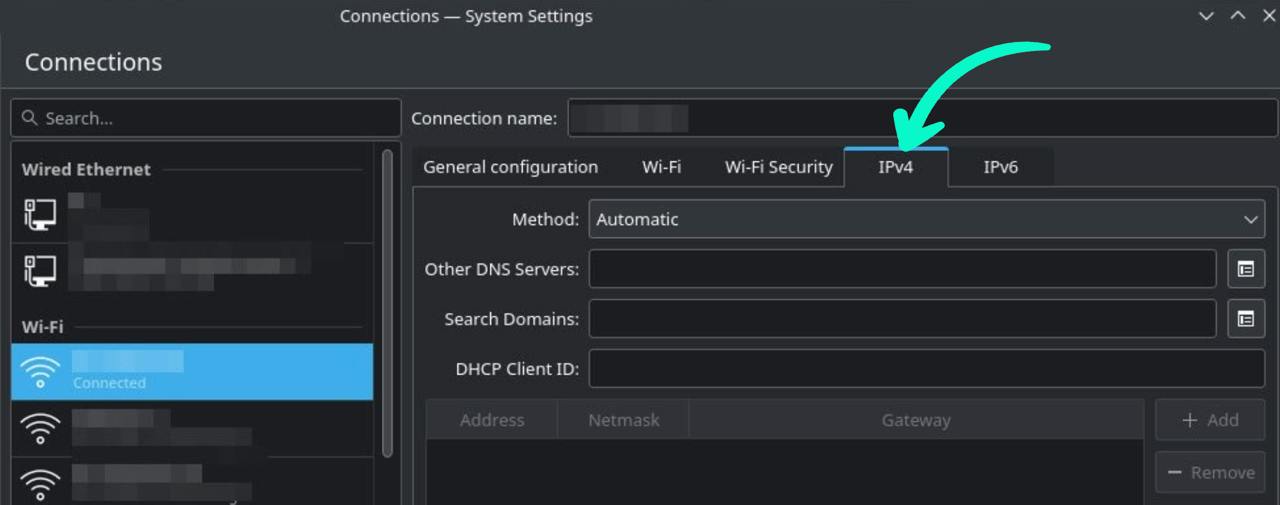
Step 4: In the IPv4 tab, switch the DNS settings from Automatic to Manual.
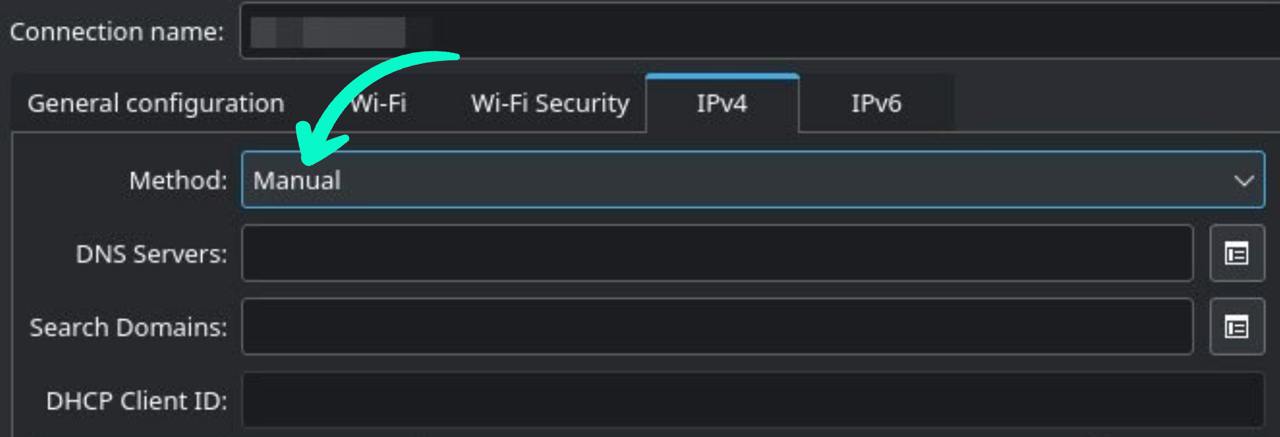
Step 5: In the DNS Servers field, add the DNS server addresses you want to use (for example, Google DNS: 8.8.8.8, 8.8.4.4). Separate them with a comma.
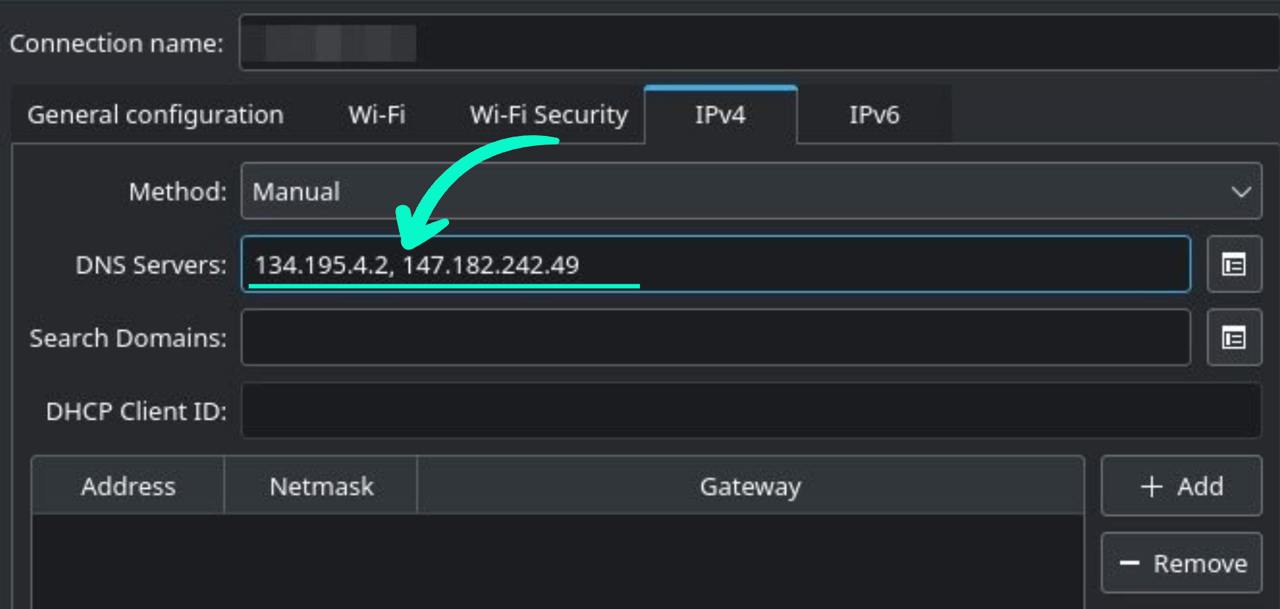
Step 6: After adding the DNS servers, click Apply or Save to finalize your changes.
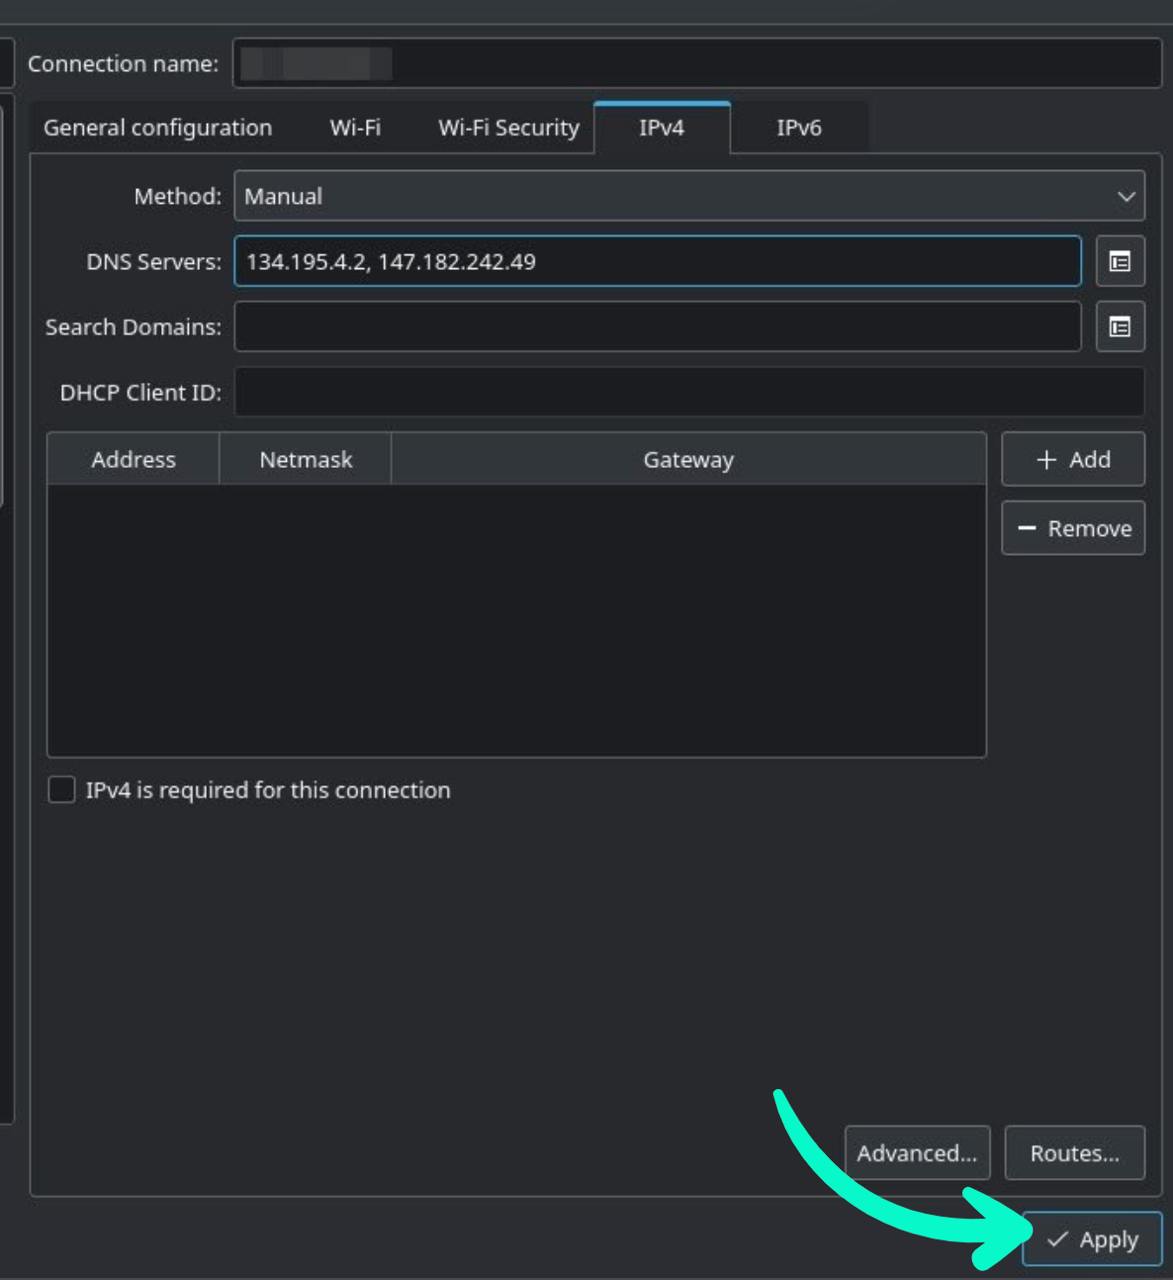
Step 7: To apply the new DNS settings, restart your network connection by disconnecting and reconnecting to the network.
Step 8:
Importing SSL certificates on Linux for the possibility of using the https protocol:
To carry out this process, please follow the instructions provided below, which are hosted on the official website
Adding Trusted Root Certificates to the Server.
This guide contains detailed instructions for successfully completing the SSL certificate import process.
Download the certificate using the link below:
SSL certificate
OR
1. Navigate to the directory
cd /usr/local/share/ca-certificates/
2. Create a new folder using the command:
sudo mkdir certificates
3. Copy your .crt file into the newly created 'certificates' folder.
4. Verify and ensure the permissions for the folder and file are correct. It should be 755 for the folder and 644 for the file.
5. Run the command to update the certificates..
sudo update-ca-certificates
6. Finally, restart your browser for the changes to take effect.
