Instructions for MacOS
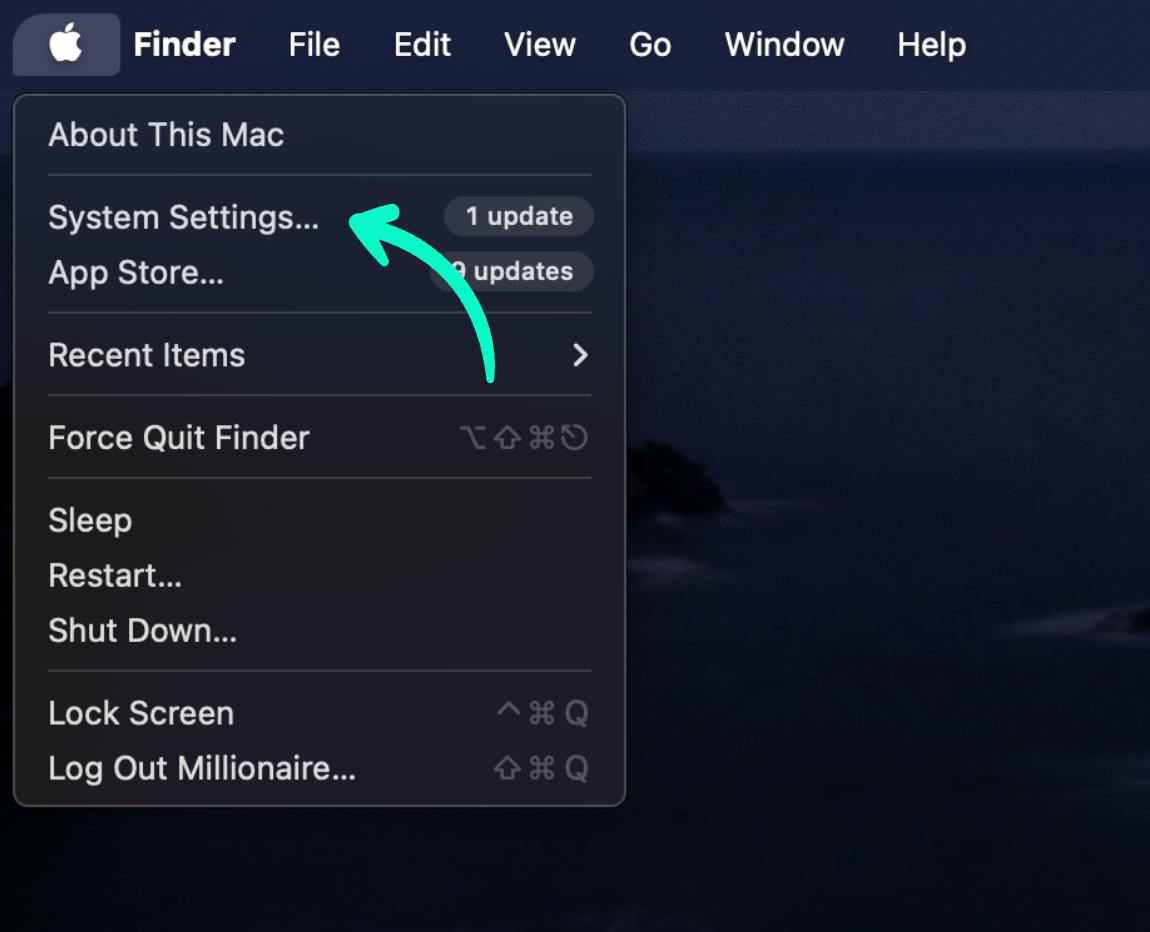
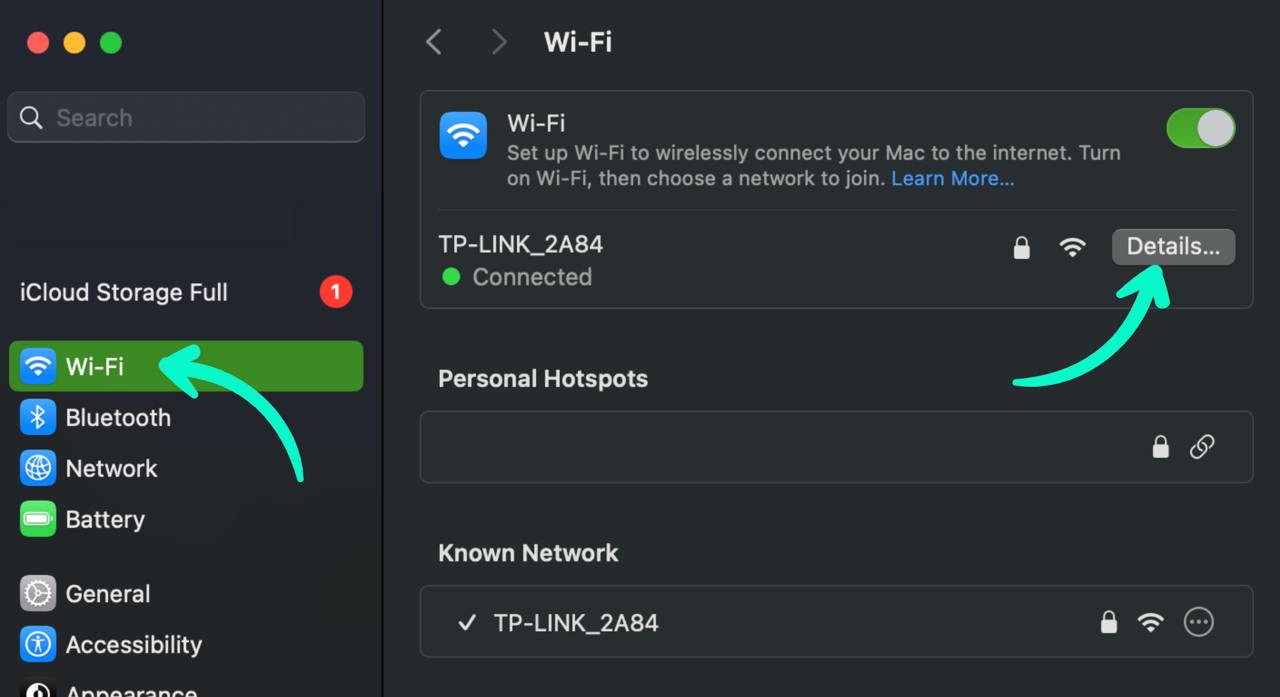
Step 1: On your Mac, click the Apple icon in the top-left corner of the screen and select "System Preferences" from the dropdown menu. In the "System Preferences" window, find and click on "Network."

Step 2: In the network settings, select the network you are currently connected to (it is usually highlighted by default). Then, click on "Advanced."

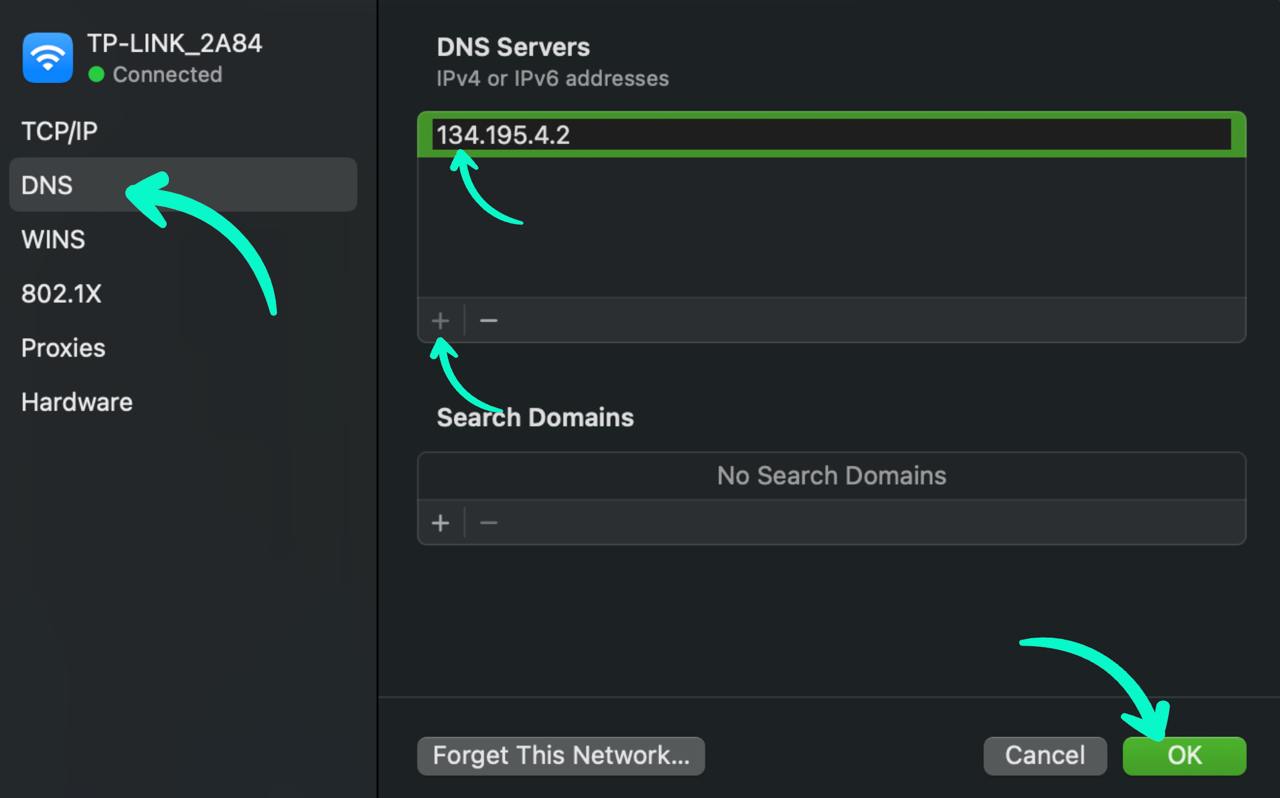
Step 3: In the "Advanced" window, go to the "DNS" tab. To add a new DNS server, click the + button at the bottom of the DNS servers list and enter the new DNS address (for example, 134.195.4.2). To remove a server, select it and click the - button. After making the necessary changes, click "OK," and then click "Apply" in the main network window to save the changes.

Step 5:
Importing SSL certificates on MacOs for the possibility of using the https protocol:
To carry out this process, please follow the instructions provided below, which are hosted on the official website
How to Import and Export SSL Certificates in Mac.
This guide contains detailed instructions for successfully completing the SSL certificate import process.
Download the certificate using the link below:
SSL certificate
