Instructions for Windows
Step 1:
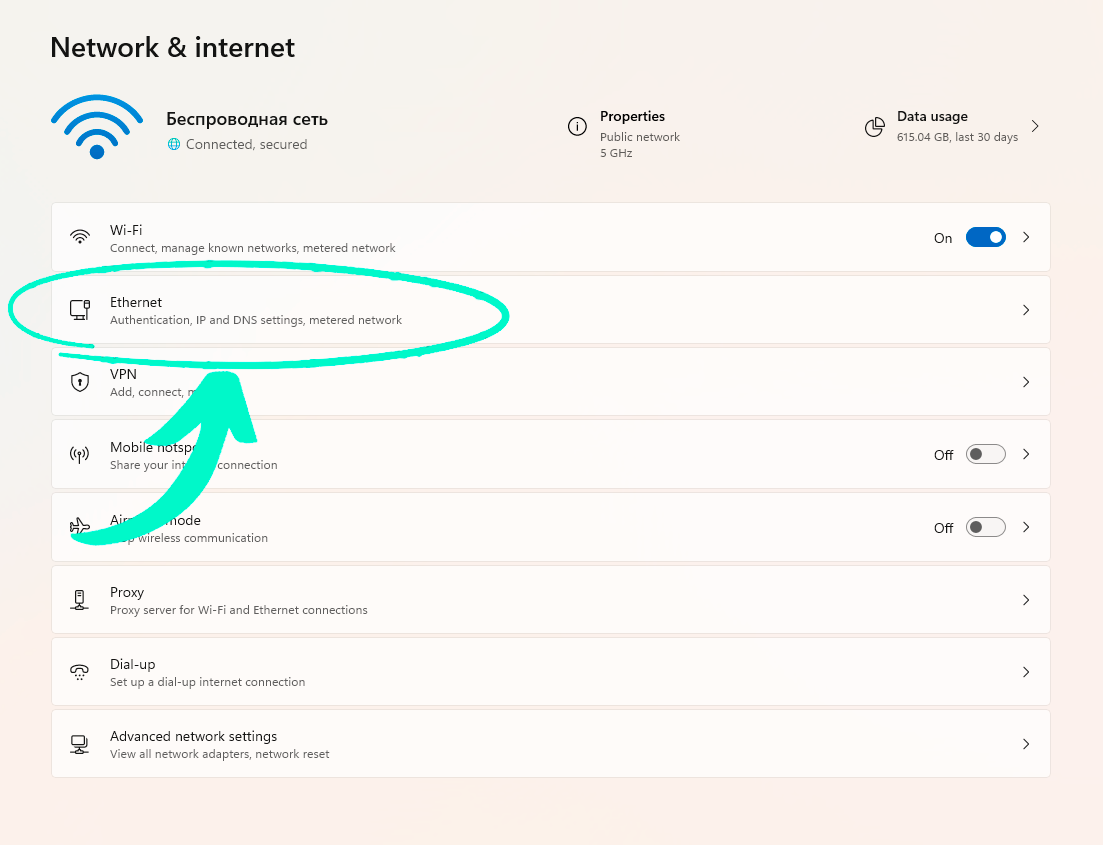
Right-click on the network icon in the taskbar (lower-right corner of the screen) and choose Open Network & Internet settings.
In the Network & Internet settings window, click on the "Ethernet"

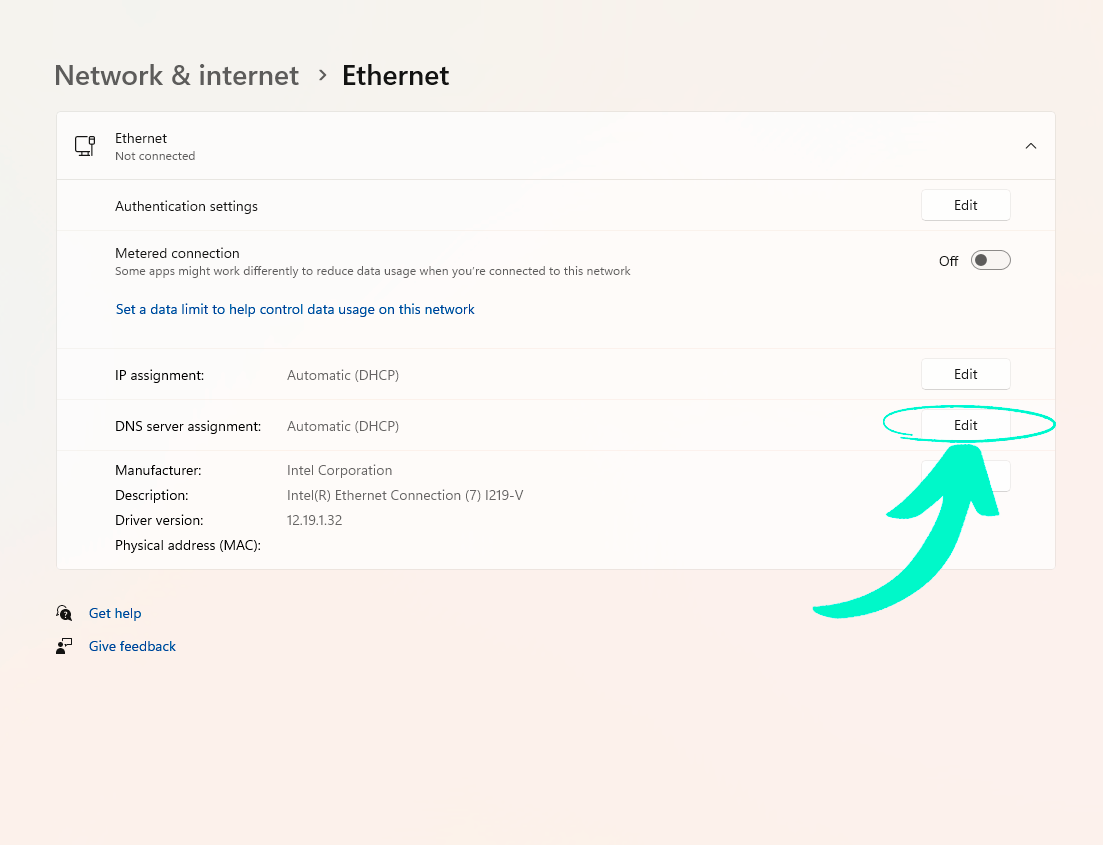
Step 2: Click on "Edit" button next to "DNS Server Assignment".

Step 3:
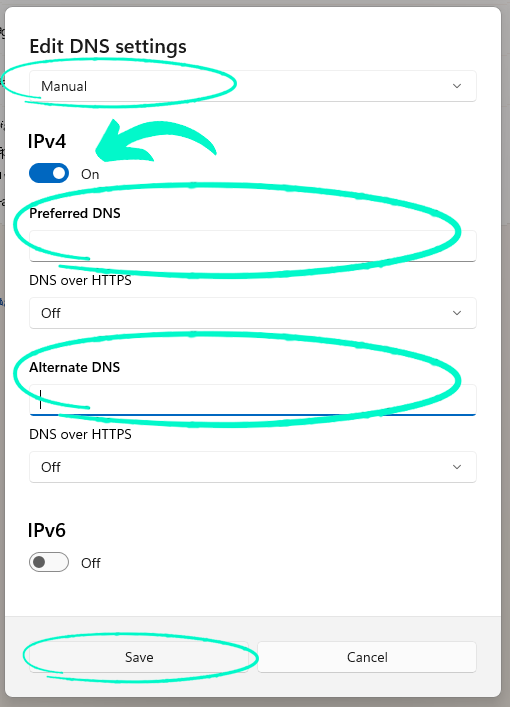
Сhange "Automatic (DHCP)" to "Manual" in the modal window
Click on "IPv4" and enter your preferred DNS servers in the following fields.
Step 4: Click "Save" to close the window.

Your DNS settings are now changed. Your device now will use the new DNS servers when connected to the network.
Step 5:
Importing SSL certificates on Windows for the possibility of using the https protocol:
To carry out this process, please follow the instructions provided below, which are hosted on the official website
Adding Trusted Root Certificates to the Server.
This guide contains detailed instructions for successfully completing the SSL certificate import process.
Download the certificates using the links below:
SSL certificate 1
SSL certificate 2
